
{ Linux at home | Installation | Linux on a second disc }


Linux on a second disc
The proposal here is to leave the Windows installation alone in its well working state. We install Linux on its own disc. At the end of the installation the Linux boot loader will replace the Windows boot loader. The Linux boot loader will give you the choice at each reboot, to boot either Linux or Windows.
In a desktop computer you may be able to install an additional, internal disc. With a laptop, you can use an external USB3 drive. Note, however, that both discs are required to boot either of the two operating systems, no matter whether Windows or Linux.
An elegant variation is to have the second disc in a separate computer. If you have an unused old computer, simply erase everything and install Linux as the only operating system.
This page may seem rather long. The installation requires responses to a large number of questions. But this is not complicated. The instructions here are rather expansive, as they go a bit deeper into the detail of the process of installation and of the relevance of the questions.
Preparation
We need the following items:
- The computer with keyboard and screen.
- Connection to the Internet.
- A USB mouse. With a laptop, the trackpad may sometimes not work in the graphical installation. You can, however, use a non-graphical installation without any mouse.
- The drive on which Linux will be installed.
- The Linux installer, either copied to a USB stick or burnt to a CD. The computer must support booting from this device and medium. Newer laptops have no CD drive, very old computers may not support booting from a USB stick.
Starting the installer
Boot loader menu.
We choose a graphical expert installation. The non-expert installation is hardly any easier and leaves out a few important questions. Graphical or not makes little difference; the appearance and navigation through the questions will differ a little.
- Shut down the computer and boot the installer, i.e. boot from the USB stick or CD.
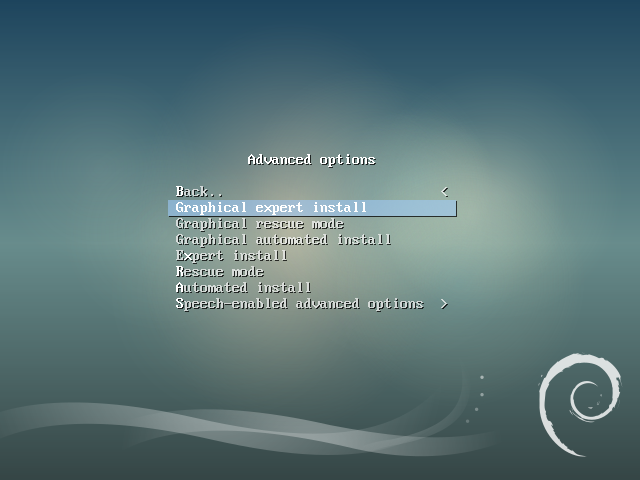
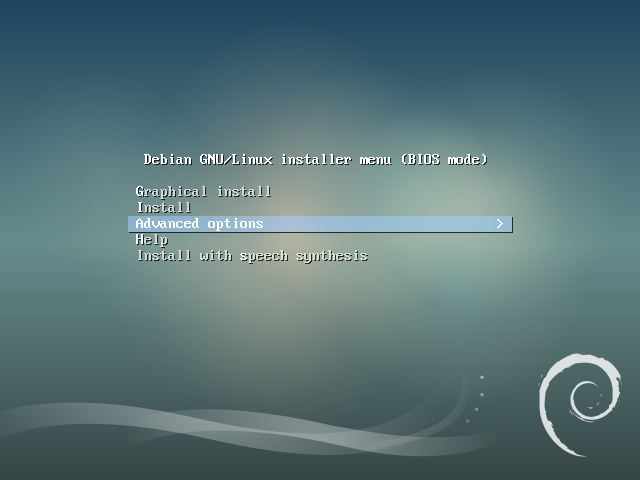
- This is already a Linux boot loader. After a few messages that are common in a Linux boot, a menu with several options appears. Use the cursor keys and the Return key to select "Advanced options". (screenshot)
- Then select "Graphical expert install". (screenshot)
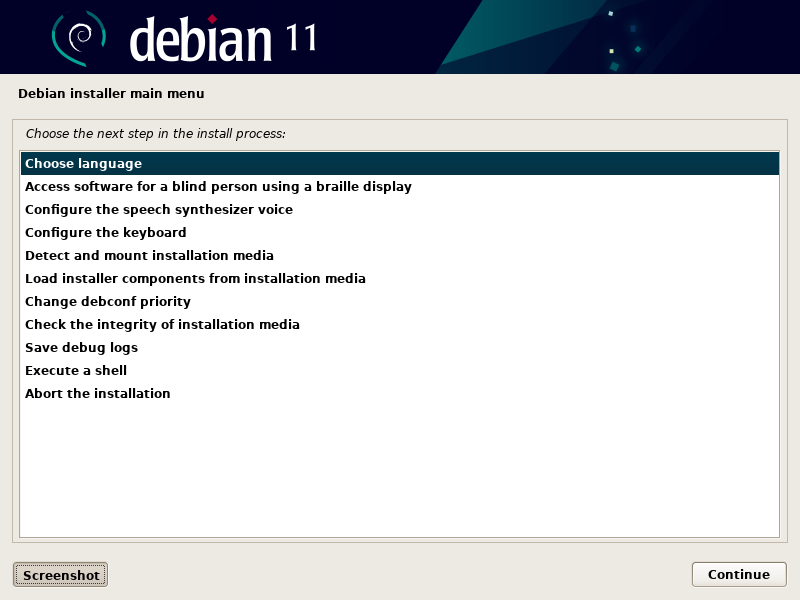
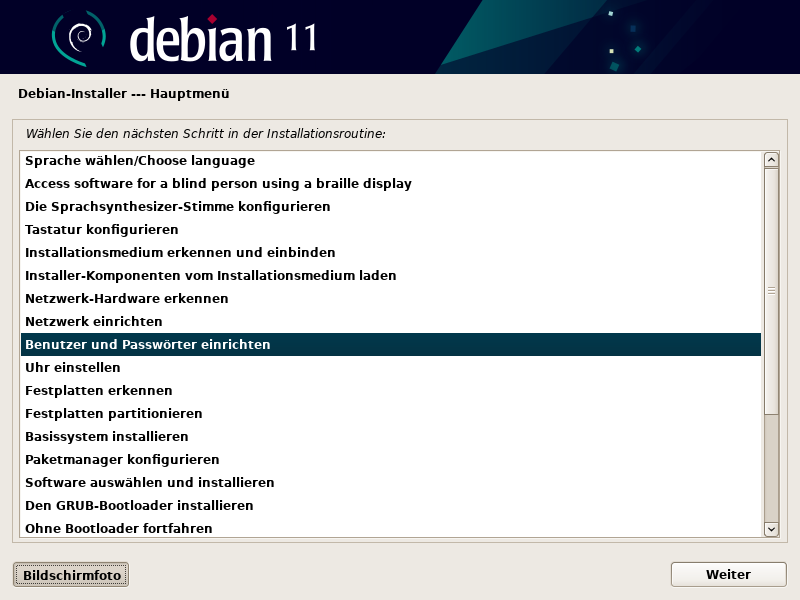
- A minimal Linux system will now start. After further messages, common in any Linux boot, the page "Debian installer main menu" appears. This is a list of main points of the installation. You will return here a number of times, although the list of options will gradually change. But you do not have to make actual choices, the pre-chosen next topic is always correct. In each topic of the main menu you will enter into further question-and-answer pages, but will then return here. (screenshot)
Settings of language and access
System locale and other locales.
The first complex of questions is about language, keyboard, etc.
- Select "Choose Language". (screenshot)
- Select "German – Deutsch". The installer will work half and half in English and German. The installed system will use German. (screenshot)
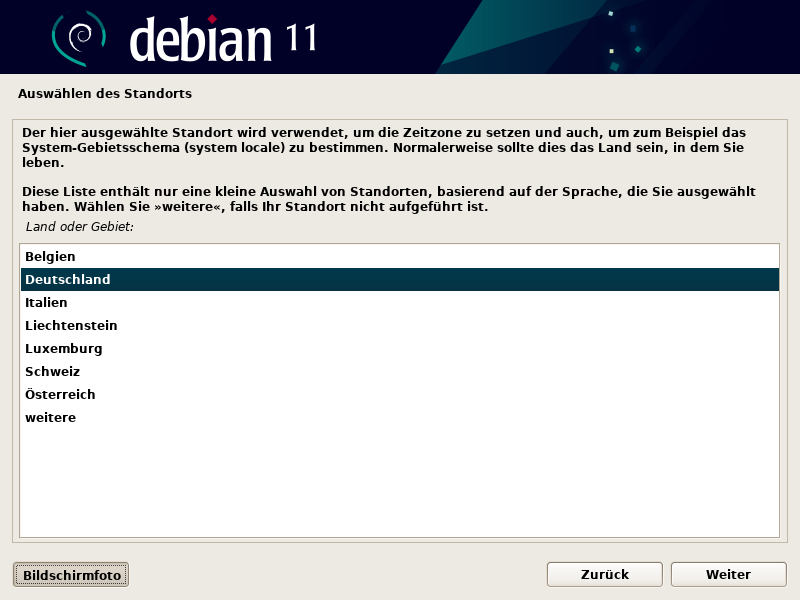
- Select "Deutschland" (Germany). Although the question appears to be for the location, what is in fact meant is the convention for dates, numbers, character sets, spelling aids etc. (screenshot)
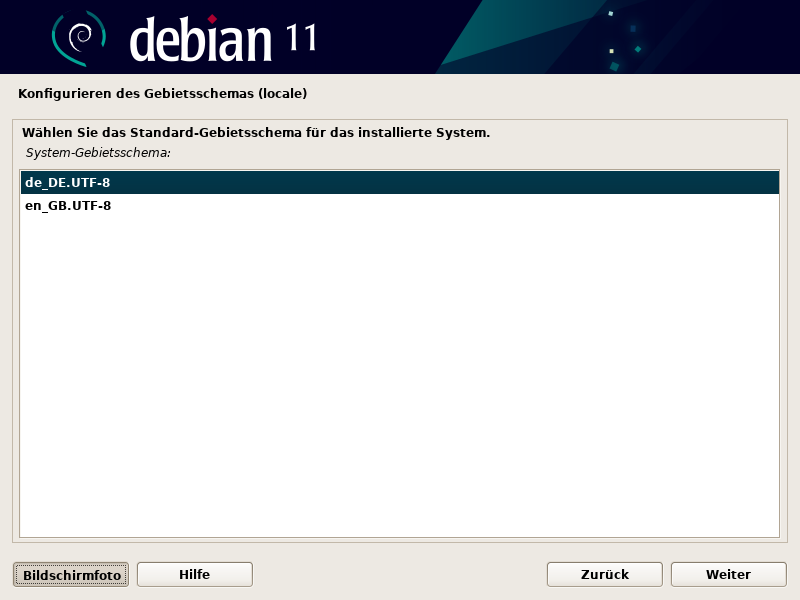
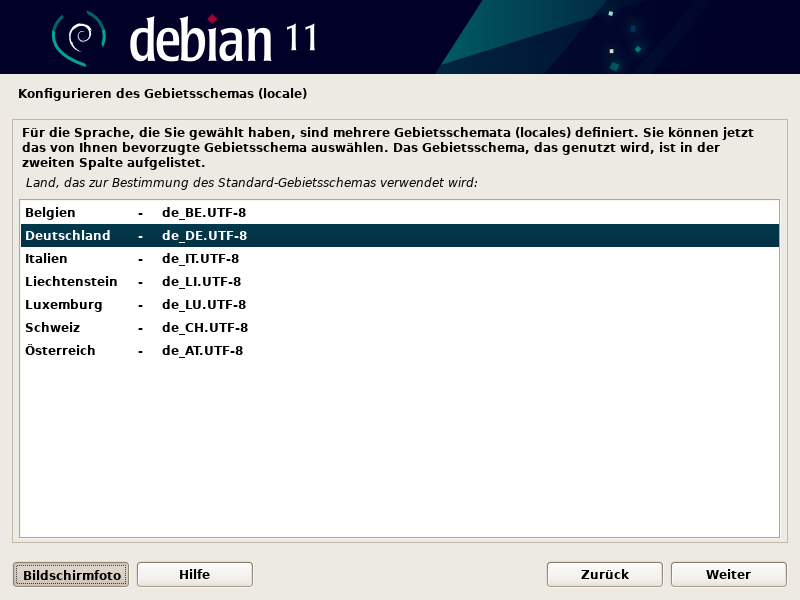
- Select (if German) "de_DE.UTF-8" as standard locale. "de" is for the German language, "DE" is for the country Germany, "UTF-8" is the character set. (screenshot)
- Select further locales that might be useful for you. It is a good idea to install an Anglo-Saxon locale like en_US.UTF-8: While some applications obey your locale and convert between decimal comma and decimal point, other applications ignore this and will require decimal points. If you (temporarily) switch to the Anglo-Saxon locale, you can avoid problems (and use decimal points in all applications). Since I use British English as second language anyway, I choose en_GB.UTF-8 here. (screenshot)
- Confirm the selection for the standard or system locale. (screenshot)
- You now return to the main menu. Quickly go through the points regarding "blind person" and speech synthesizer; no questions are asked here. Then go into the keyboard configuration. (screenshot)
- Declare your keyboard hardware as it actually exists. "Deutsch" is further below than expected, because this is sorted alphabetically in English, German being between Georgian and Greek (Griechisch). (screenshot)
Access to the installer drive and its resources
Although there is already a minimal Linux system running, it has not yet formal access to the USB stick (or CD), where some components of the installer remain to be found and loaded.
- The next point in the main menu is "Installationsmedium erkennen und einbinden" (detect and mount installation media). (screenshot)
- The detection of the media is confirmed. (screenshot)
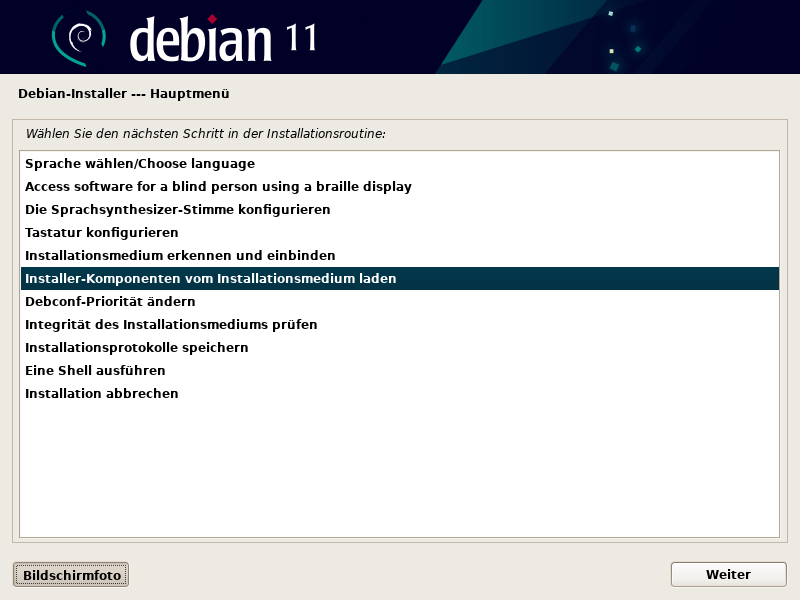
- The next point in the main menu is "Installer-Komponenten vom Installationsmedium laden" (load installer components from installer media). (screenshot)
- Simply accept the default choice of loading usb-storage. If you use a USB stick, this question does not even appear. (screenshot)
- Simply accept the default choice of no further components. (screenshot)
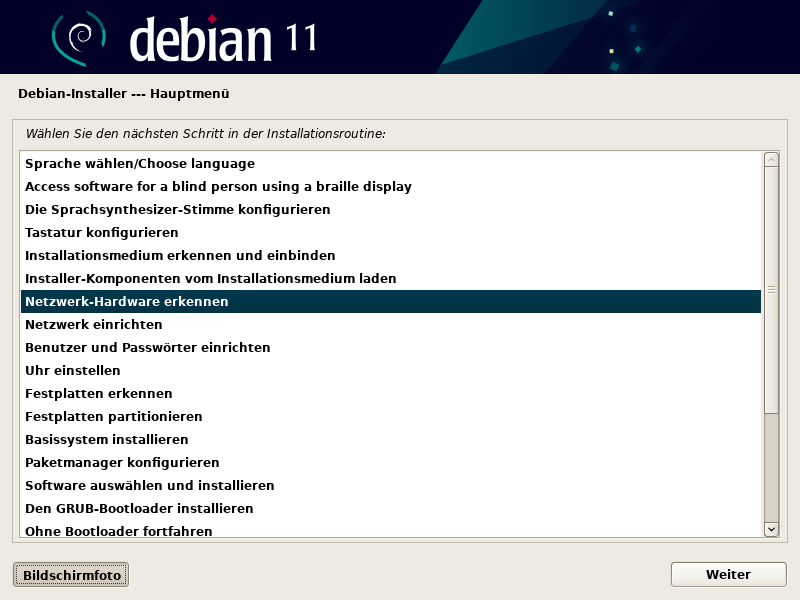
- You now return to the main menu. This looks quite different, because we are now able to proceed with the installation itself. (screenshot)
System settings prior to installation

Setting the computer name.
Shadow passwords and root account.

Password for the user account.

Time zones.
Here we connect to the Internet, configure the user account and synchronise the system clock.
- In the main menu select "Netzwerk-Hardware erkennen" (detect network hardware). (screenshot)
- Very often there will now appear the question whether to load further firmware to support the network hardware. The Problem has, however, two layers. First, you may need a driver (meaning a kernel module), which may or may not exist in the installing kernel. The module may then also require additional, non-free firmware, which can be difficult to obtain and make available to the installer. There is also the possiblity that the hardware is then still not supported. It best to put the WiFi connection aside and use a wired Internet connection. (screenshot)
- In the main menu select "Netzwerk einrichten" (configure the network). (screenshot)
- If asked, confirm the timeout of 3 s.
- If this is a laptop with WiFi and wired network devices, choose the wired network device.
- Choose to configure the network automatically. Normally your broadband modem will offer the necessary services. It is then best to leave these matters to the two devices – computer and modem. (screenshot)
- Choose the computer name (host name). (screenshot)
- Confirm the domain name. This is normally communicated correctly by the modem. Otherwise choose a domain name, which you use on all computers of your home network. Your choice has no wider meaning. "home" or "local" are common choices. (screenshot)
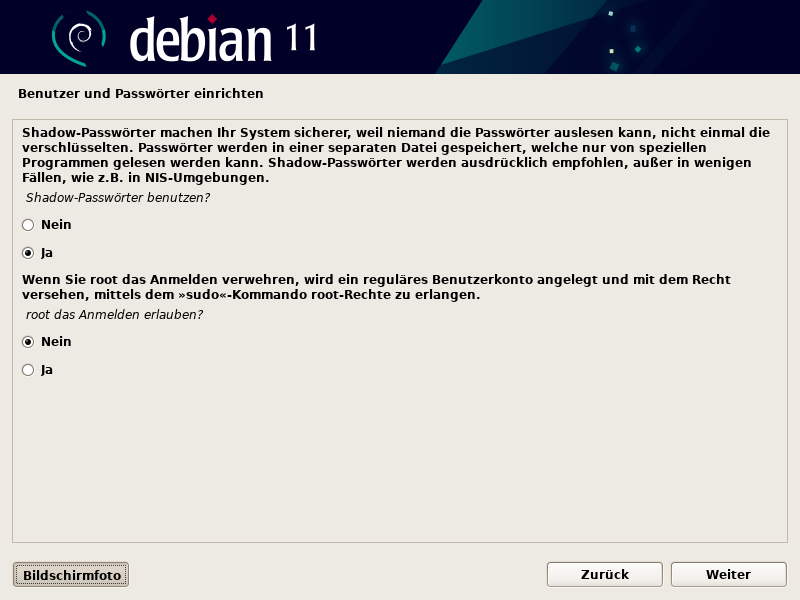
- In the main menu enter into "Benutzer und Passwörter einrichten" (set up users and passwords). (screenshot)
- Choose to enable shadow passwords. For home use it is usually best not to permit root logins. There is then no root password and no possibility of it being guessed. (screenshot)
- Enter first and last name of the user. This is then not the technical account name or login name, but indicates which person will be using the account. By the way, this account will have sudo privileges. If the computer is used by the whole family, then this is the expert among them who will manage the computer. (screenshot)
- Enter the account name or login name. This must not be too long, must use only lower-case letters and digits, must not start with a digit, and must not use characters with a dieresis, accent, etc. Traditionally, this is kept as short as eight characters or less; modern Linux systems permit longer account names, but you do not want to type a very long name all the time! (screenshot)
- Enter the password twice. The installer checks that you manage to type the same password both times. (screenshot)
- In the main menu select "Uhr einstellen" (configure the clock). (screenshot)
- In general, NTP should work without problems. The clock will then be synchronised with the Internet. (screenshot)
- The default NTP server is provided by Debian. This should normally not pose a problem. (screenshot)
- There are only two time zones on offer. The first is derived from your earlier choice of standard locale, the second is Universal Time (without summer time switching). The suggestion by the installer to go back an change the standard locale is silly. The question is a different one and all time zones should be offered here: A German in Tokyo might quite legitimately want to use a German locale combined with the Tokyo time zone. If neither the default time zone nor UTC are acceptable to you, then we have to change this later in the running system. (screenshot)
Disc configuration

Disc partitions.
Here we select the new disc and thereby protect the existing disc and its Windows system from destruction. We also choose encryption or not.
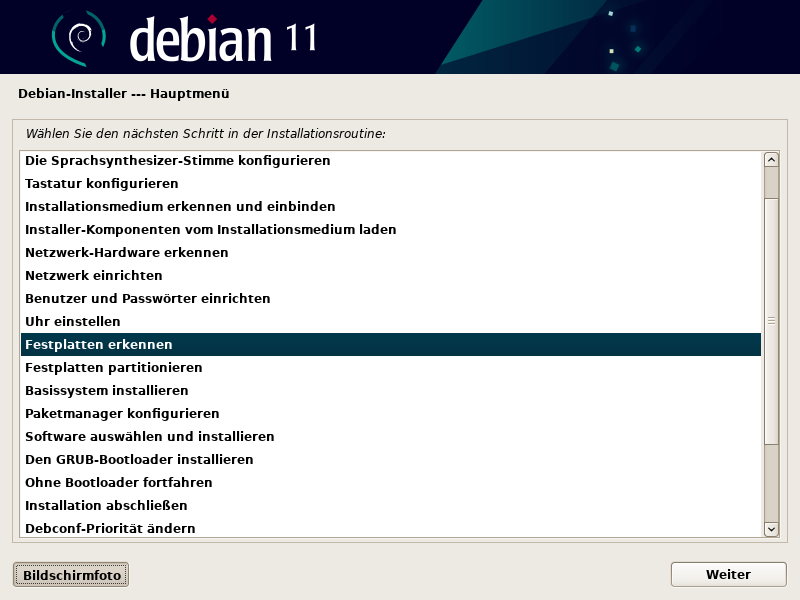
- In the main menu select "Festplatten erkennen" (detect discs). (screenshot)
- In the main menu select "Festplatten partitionieren" (partition disks). (screenshot)
- Select "Geführt – gesamte Platte mit verschlüsseltem LVM" (Guided – use entire disc and set up encrypted LVM), or, if you do not want to encrypt, select "Geführt – vollständige Platte verwenden" (Guided – use entire disc). (screenshot)
- Select the new disc. All content will soon be destroyed. It would be a really bad idea to select the old disc with its Windows installation. (screenshot)
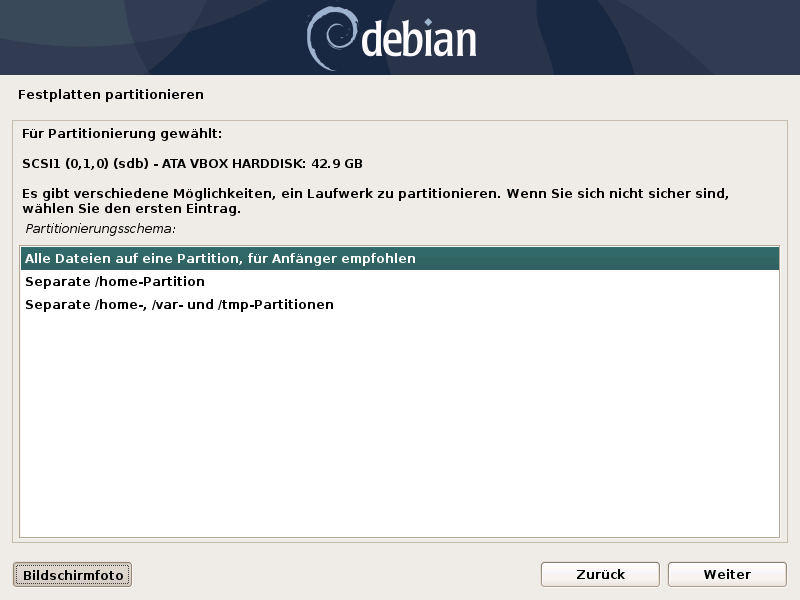
- As partitioning scheme simply select "Alle Dateien auf einer Partition" (all data in one partition). (screenshot)
- In case of encryption, the following additional questions
appear:
- Confirm that the disc will now be modified. Check once again that you have selected the new Linux disc and not the valuable Windows disc. (screenshot)
- The installer would now overwrite the whole disc with random data. It is best to abort this. It takes very long and has little influence on the security of the future data within the new Linux system. (screenshot)
- You now have to set the passphrase, which you will later enter at each boot. (screenshot)
- Confirm the VG name. This will be almost invisible to you and there is no point in changing this. (screenshot)
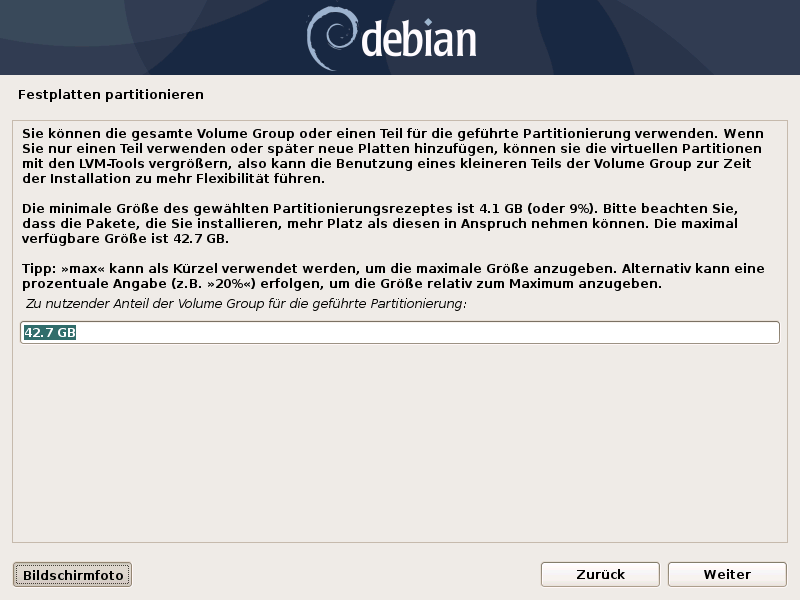
- Confirm to use the whole available space. (screenshot)
- There appears a list of all discs, LVM volume groups (VG), LVM volumes, encrypted partitions, and other disc partitions. As a novice you will find this more confusing than helpful. You have to select "Partitionierung beenden und Änderungen übernehmen" (Finish partitioning and write changes to disc). (screenshot)
- You have to confirm once more that all is in order. (screenshot)
The Installation proper
Country for the package download server.
Software selection.
We now install the system. It consists of a large number of "packages", which correspond approximately to applications. There are also software libraries and the Linux kernel. The visible user interface is called the desktop environment, usually Gnome 3.
- In the main menu select "Basissystem installieren" (install the base system). This takes a while. (screenshot)
- As kernel select "linux-image-amd64". (screenshot)
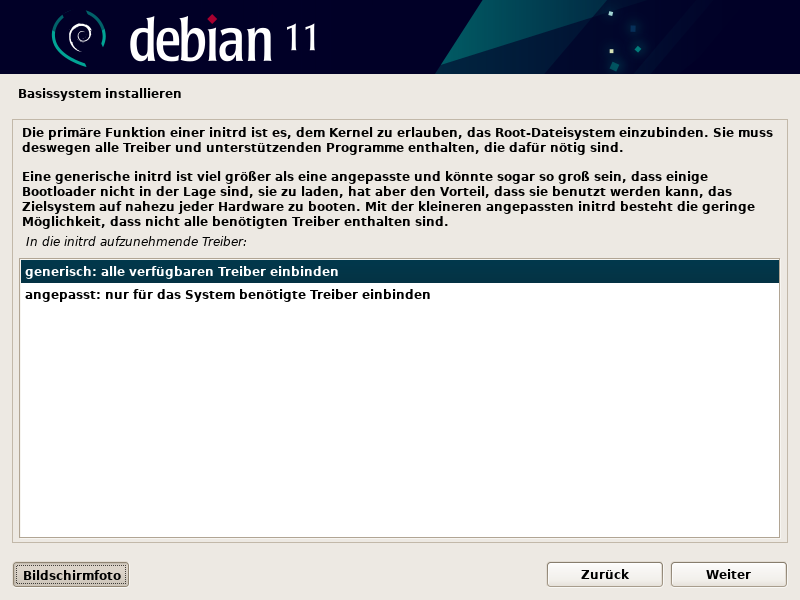
- Select "generisch" (generic). (screenshot)
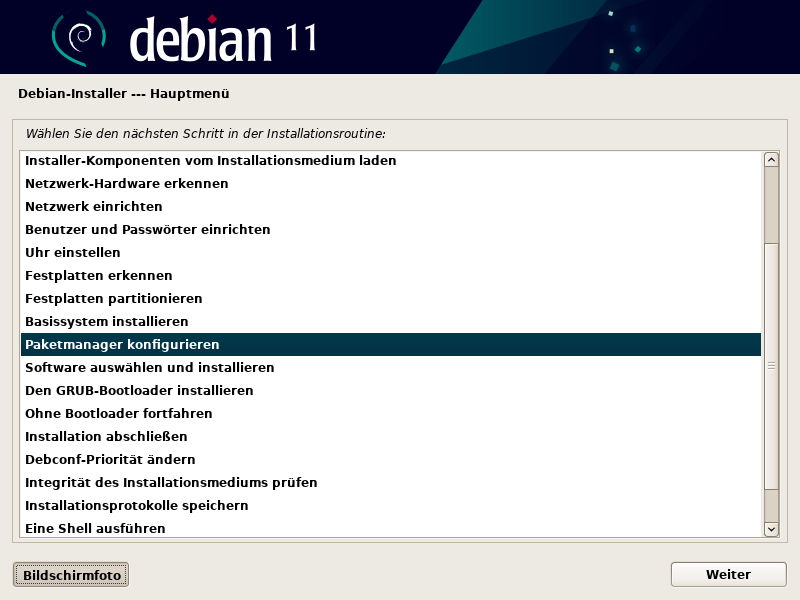
- In the main menu select "Paketmanager konfigurieren" (configure the package manager). (screenshot)
- There may now be a question about additional CDs, decline this.
- Confirm the use of a network mirror (Netzwerkspiegel) from which the packages will be downloaded. (screenshot)
- Confirm "http" as protocol. (screenshot)
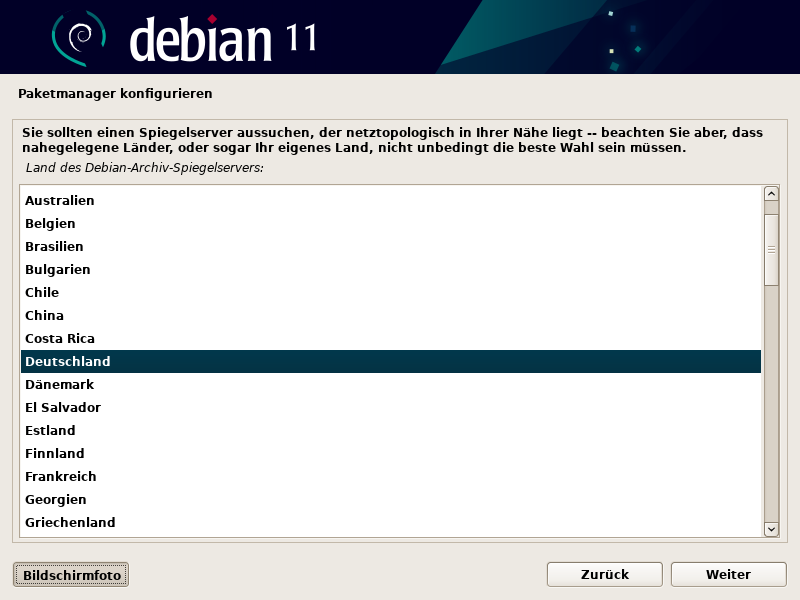
- Select a country near your permanent location, usually "Deutschland" (Germany). (screenshot)
- Confirm the default setting for the network mirror in the chosen country.
- Confirm the empty HTTP proxy. (screenshot)
- Confirm the use of non-free firmware. (screenshot)
- Change the selection and use non-free software. (screenshot)
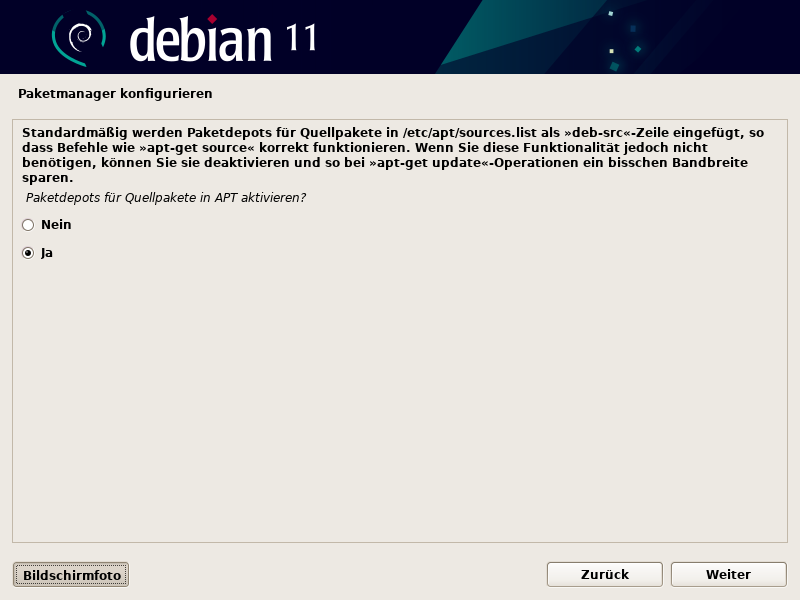
- Confirm the availability of source repositories. (screenshot)
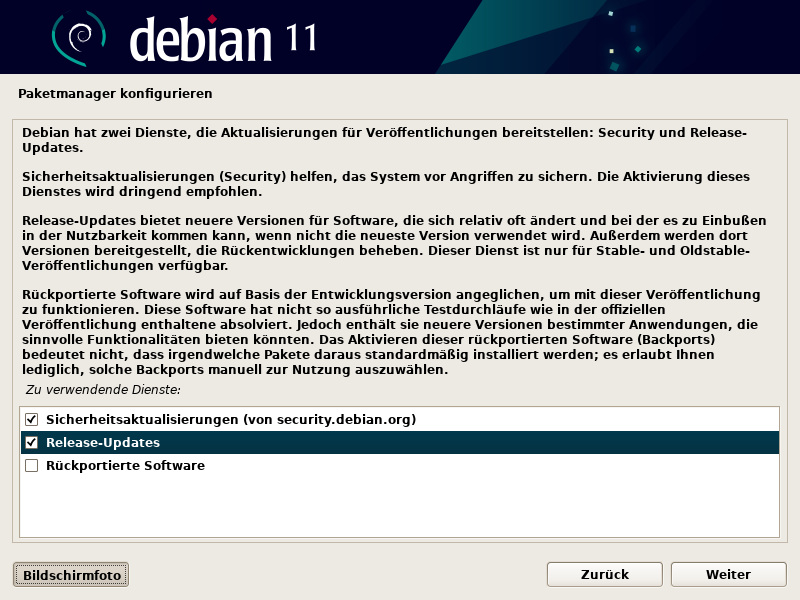
- Select security updates and also release updates. (screenshot)
- In the main menu select "Software auswählen und installieren" (select and install software). (screenshot)
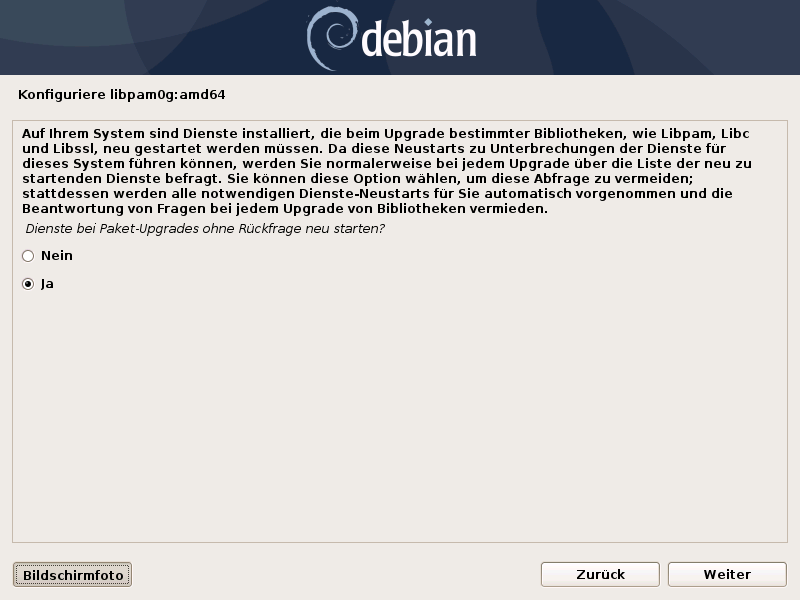
- My recommendation is to restart services without question after a package upgrade. (This question may not appear.) (screenshot)
- To make things easy, install security updates automatically. This will then happen when necessary and while the computer is running. That can, however, be at an inconvenient time, like just after boot and when you have something urgent to do. Also, you receive no information about what is being done, and any required reboots will not occur. The alternative, however, is that nothing ever happens, and that the security of the system slowly deteriorates. (screenshot)
- Confirm that you will not take part in the package usage survey. (screenshot)
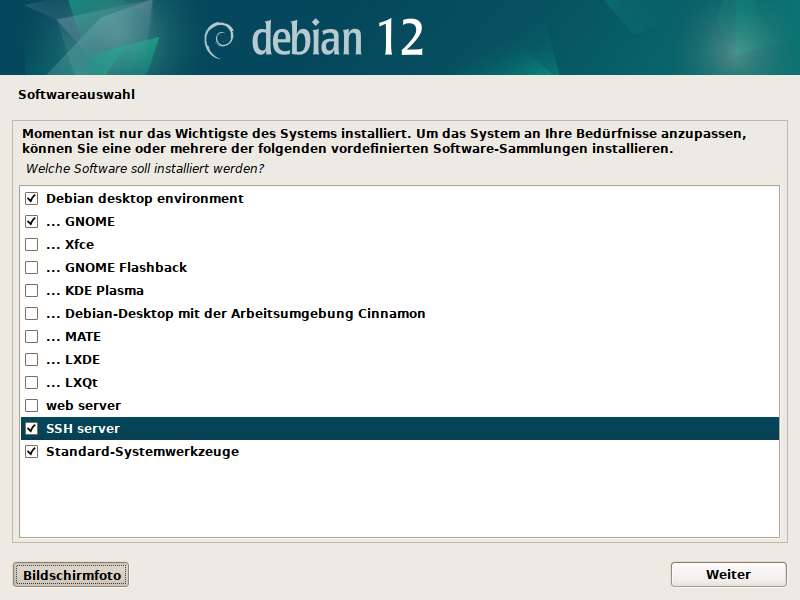
- In "Softwareauswahl" (software selection) the default settings are usually adequate. You will get a graphical desktop (Gnome) and standard system utilities. You might consider adding "SSH Server" in order that you can login remotely from one computer into the other. After this question, the installation will take a very long time, in case of low bandwidth perhaps even an hour. (screenshot)
Boot loader and completion

System clock for Linux or Windows/Linux.
Although the Linux system has now been installed, at boot the Windows boot loader would take charge and boot Windows. We have to install the GRUB boot loader in such a manner that it will give us the choice between Windows and Linux.
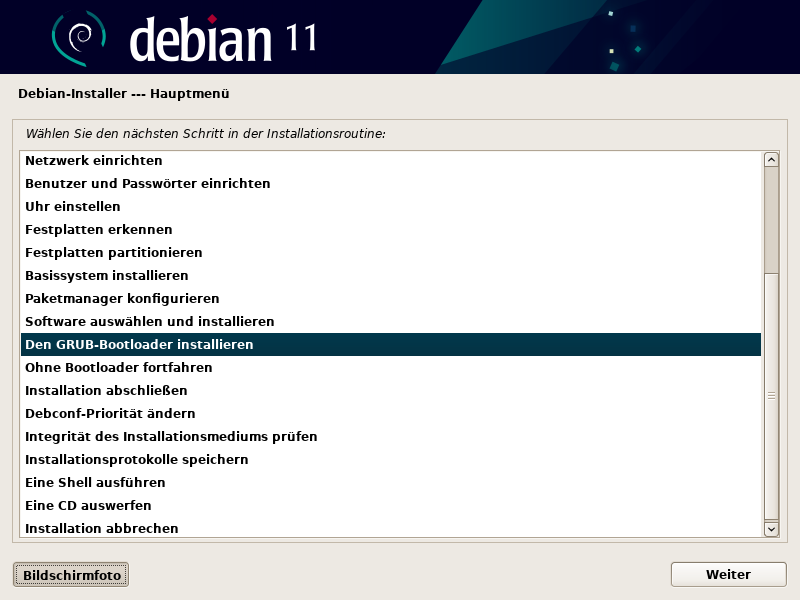
- In the main menu select "Den GRUB-Bootloader installieren" (install the GRUB boot loader on a hard disc). (screenshot)
- Select the disc for the MBR and the boot loader. This is the system disc, where Windows resides. This is not the second disc where Linux resides. If, however, this is a separate Linux-only computer, then this is the system disc where Linux resides. (screenshot)
- The question about EFI is often not relevant. Whether your computer boots via EFI or BIOS/MBR was configured automatically above. But it can be advantageous, here to copy the EFI version of the boot loader into the EFI removable media path, i.e. to answer "ja" (yes). (screenshot)
- The question about NVRAM configuration should perhaps be answered with "nein" (no). However, the Linux boot loader might then remain unrecognised and Windows might remain the only bootable system. (screenshot)
- The installer now checks whether there are other installations
in addition to this new Linux system.
If your system still boots via the old method of Master Boot Record (MBR), check carefully that the other operating systems – on this or another disc – are detected and listed. Then install the GRUB boot loader in the master boot record (MBR), where it will displace the Windows boot loader. (screenshot)
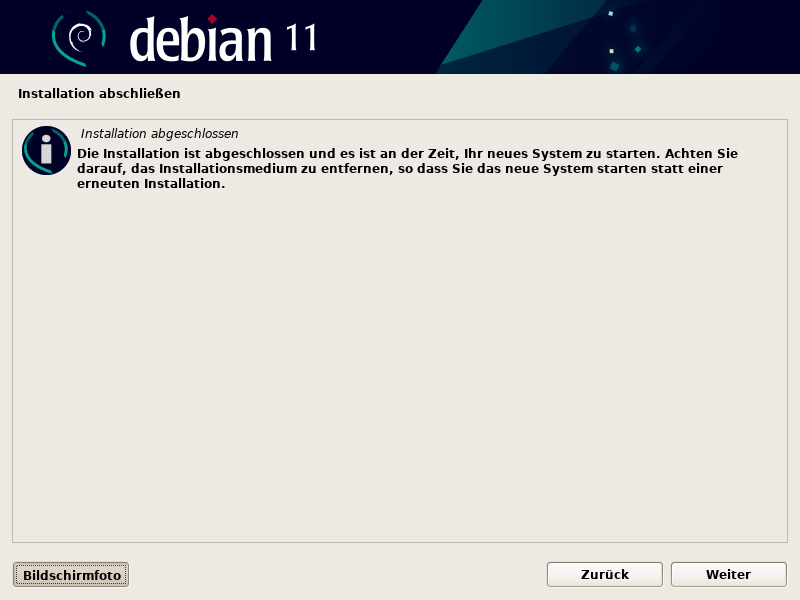
If your system boots via the newe EFI method, this is not a critical issue; EFI has other methods to find and boot alternative operating systems. - In the main menu select "Installation abschließen" (finish the installation). (screenshot)
- In Linux, the system clock is distinct from the time display.
The system clock should always run on Universal Time (Weltzeit).
When you ask what time it is, this is converted according to the
configured time zone and whether summer time is in effect.
In Windows, the system clock runs in the chosen time zone and jumps twice a year to turn summer time on and off. To cope with this situation, the Linux system clock can also follow that convention.
For a Linux-only computer answer "ja" (yes) to UTC. But if this is also a Windows computer then you normally should say "nein" (no) to UTC. (screenshot) - Finally you are asked to remove the USB stick or CD and to restart the system. (screenshot)
First boot
GRUB boot loader.

Applications in the Gnome 3 desktop.
It is not strictly necessary to start Linux now. But you are probably curious how the computer now behaves and how the desktop environment looks.
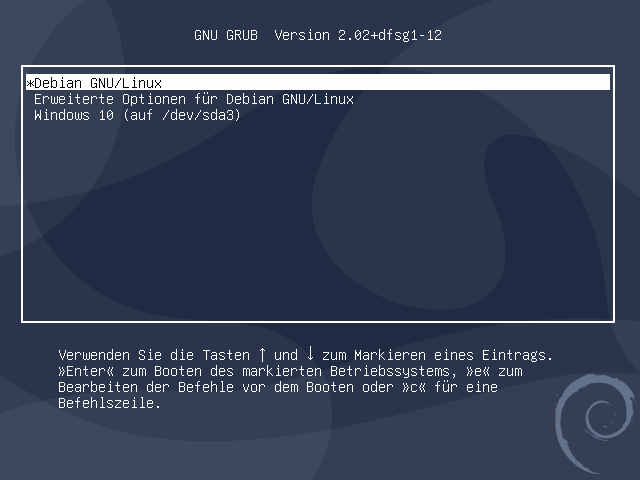
- From now on, when the computer starts, there appears initially the GRUB menu, in which Linux is the default selection. We have a few seconds to change this. This would be necessary to start Windows. (screenshot)
- When Linux starts, and if encryption was selected, then there will now be the prompt for the passphrase. (screenshot)
- Then Linux will start and finally the graphical login page will appear. Usually this shows a list of users. If not, then one can enter the technical login name. (screenshot)
- Should the login page be in screen saver, simply press Return to start the login.
- After the user has been selected or typed in, the password prompt appears. (screenshot)
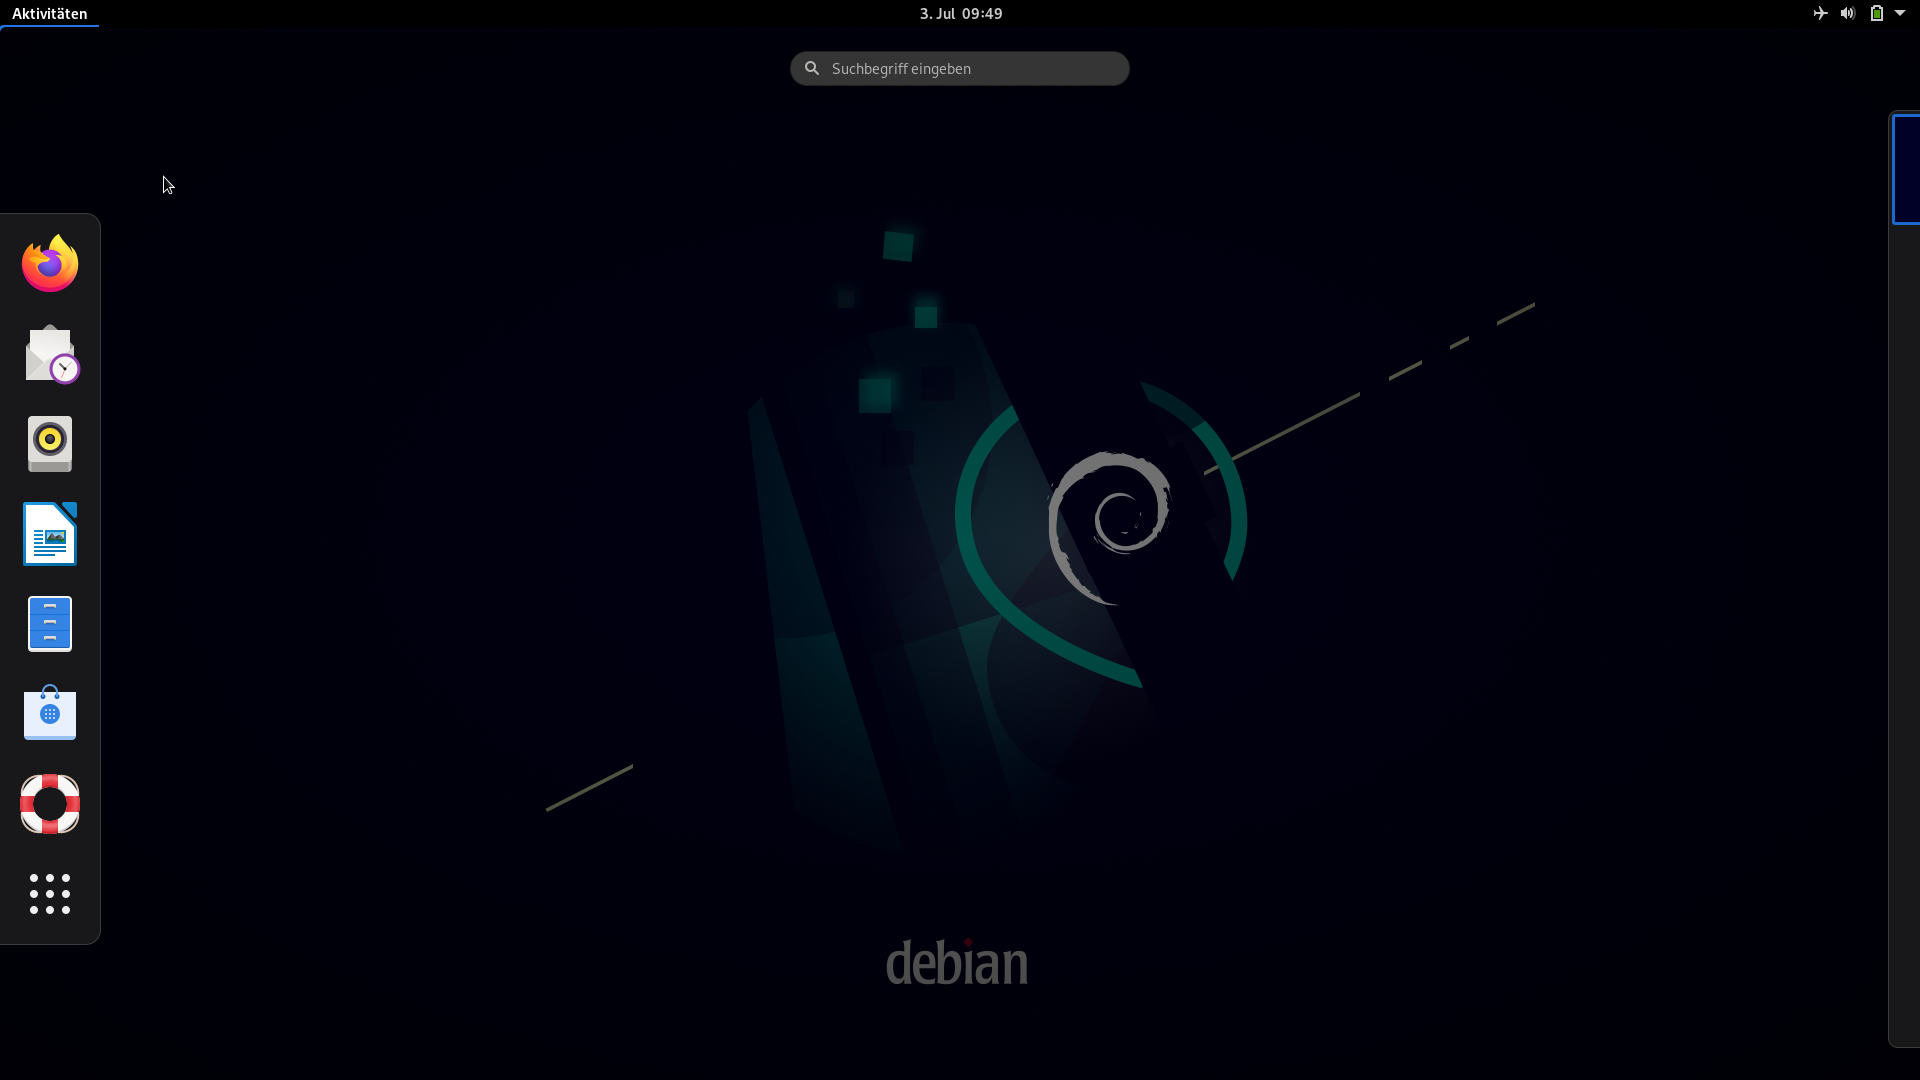
- The Gnome 3 desktop looks quite empty and unfriendly
(screenshot).
But:
- Top right is a menu where we can change settings like volume and network (screenshot). Here we can also log off, or shut down or restart the computer (screenshot).
- Much more interesting is the menu top left with the title
"Activities". When we click here three things happen
(screenshot):
- The centre of the display shrinks and any windows present are shrunk and re-arranged.
- On the right appear one or more "work spaces". We see in the main part of the display one of these work spaces, but we can have further windows open on other work spaces. We can then switch between the work spaces to switch to using the windows there.
- On the left appears the "dock" with launcher icons for a few applications and at its bottom with an icon to find all applications. (screenshot)
Corrections to the system
Perhaps we should now change a few settings. In order to do so we
start the Terminal application and use the
sudo command, so that we work from the root account. By
the way, sudo will not ask your password each time. If
you re-use sudo within 5 min, then your password
is taken as read.
Time zone
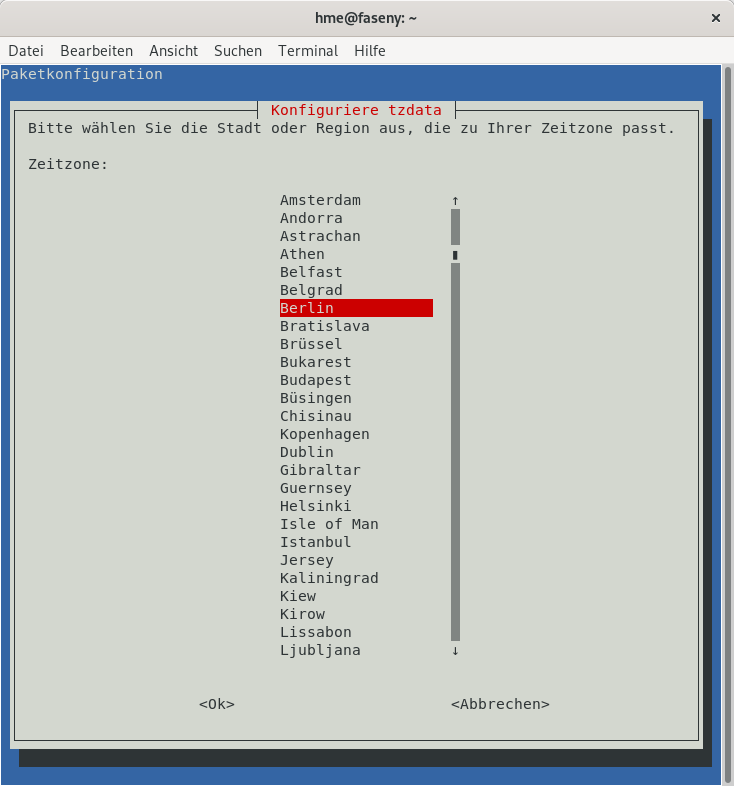
First we might perhaps change the time zone:
  $ sudo dpkg-reconfigure tzdata
    [sudo] Passwort für albert: ********
There appears a menu in the terminal, where we first choose the global region (Europe, Pacific etc., screenshot) and then a town in the desired time zone (screenshot). To select Universal Time choose the region "Etc." (Usw.) and then "UTC".
Windows as preferred system
Perhaps more urgent is the issue that we now normally run Linux. To boot Windows, we have to intervene promptly via the GRUB menu. We can change this preference. To do so we first edit a configuration file and then we run a utility to re-create the GRUB menu.
If we look carefully at the GRUB menu, we find Windows in the third line. We have to count the lines as 0, 1, 2; Windows then is #2. While we are changing this we can also give us more time to make a menu choice between Linux and Windows.
  $ sudo nano /etc/default/grub
    [sudo] Passwort für albert: ********
Near the start of the file we find these settings, which we change:
  # If you change this file,
  # run 'update-grub' afterwards to update
  # /boot/grub/grub.cfg.
  # For full documentation of the options
  # in this file, see:
  #   info -f grub -n 'Simple configuration'
  GRUB_DEFAULT=0
  GRUB_TIMEOUT=5
  ...

  ...
  GRUB_DEFAULT=2
  GRUB_TIMEOUT=10
  ...
After saving the file back to disc we run this command:
  $ sudo update-grub
    [sudo] Passwort für albert: ********
